
Rootkit Hunter (rkhunter) is a Unix-based tool that scans for rootkits, backdoors and possible local exploits. Rootkits are self-hiding toolkits secretly installed by a malicious intruder to allow that user to gain access to the server.
Rootkit Hunter offers protection by comparing SHA-1 hashes of important files with known good ones in a online database as well as:
- MD5 hash compare
- Look for default files used by rootkits
- Wrong file permissions for binaries
- Look for suspected strings in LKM and KLD modules
- Look for hidden files
- Optional scan within plaintext and binary files
This guide explains how to install and configure RKHunter on CentOS 5,6 or 7.
Note: This guide assumes you are familiar with SSH and basic command line navigation. These instructions apply primarily to customers who have Virtual Private Servers, Hybrid VPS or Dedicated servers. If you do not have root-level access you will not be able to make these changes.
1. Installation
1.1 Install EPEL Repository
All files required for installation of RKHunter are contained in the EPEL repository. The EPEL repository provides easy to install packages for commonly used software.
yum install epel-release
If this command does not work, perhaps because the CentOS Extras repository is disabled, the section below provides manual installation instructions based on your distribution version:
CentOS and Red Hat Enterprise Linux 5.x
wget https://dl.fedoraproject.org/pub/epel/epel-release-latest-5.noarch.rpm sudo rpm -Uvh epel-release-5*.rpm
CentOS and Red Hat Enterprise Linux 6.x
wget https://dl.fedoraproject.org/pub/epel/epel-release-latest-6.noarch.rpm sudo rpm -Uvh epel-release-6*.rpm
CentOS and Red Hat Enterprise Linux 7.x
wget https://dl.fedoraproject.org/pub/epel/epel-release-latest-7.noarch.rpm sudo rpm -Uvh epel-release-7*.rpm
If you get a File Not Found error message when trying to download the package, the version number might have changed. You can access the latest version of the RPM installer from the Fedora EPEL wiki page. The wiki page also includes additional instructions for Red Hat Network subscribers who are installing the EPEL repository.
1.2 Installation Rootkit Hunter
Once the EPEL Repository has been installed, issue the following command as root to start the installation routine.
yum -y install rkhunter
1.3 Update Database
rkhunter --update
1.4 Update system file properties
This is a necessary step to establish a foundation database file to compare scans. On a clean install, the first run of propupd, creates a new database file. On later scans, running the propupd command, updates the database file. So, to update the database file, you are satisfied you have only trusted source system file changes. RKHunter offers choices, in the CONF, in how you verify system file changes.
rkhunter --propupd
2. Automate Rootkit Hunter
Rkhunter can be setup to run checks every day so that we always have up-to-date information about intrusions. This can be accomplished by creating a cronjob.
Note: More recent versions of RKHunter have a cronjob preinstalled under the /etc/cron.daily directory. In this case steps 2.1, 2.2 and 2.3 can be ignored.
2.1 Create Cron File
Create the run-file in the following location (RHEL based distributions only):
nano -w /etc/cron.daily/rkhunter.sh
2.2 Insert Shell Script
The script below can be configured to send email notifications to a specified email id. The --versioncheck checks our threat definitions are up to date. The --update option updates our threat definitions, if required. The --cronjob option tells rkhunter to not require interactive key presses. You need to insert this short shell script to the rkhunter.sh file we have just created.
#!/bin/sh
(
/usr/local/bin/rkhunter --versioncheck
/usr/local/bin/rkhunter --update
/usr/local/bin/rkhunter --cronjob --report-warnings-only
) | /bin/mail -s 'rkhunter Daily Scan Report (PutYourServerNameHere)' your@email.here
Important: Remember to change: (PutYourServerNameHere) AND your@email.here to a valid server name / e-mail address
2.3 Set Execute Permissions
Set execute permission on the file you have just created:
chmod 755 /etc/cron.daily/rkhunter.sh
The cron utility will run once daily, and if a threat is detected, the rkhunter command itself will email our user to alert them. If no problems were found, no email will be received.
3. Rootkit Hunter configuration
The configuration file for rkhunter can be found at:
/etc/rkhunter.conf
3.1 Setup Mail Notifications
E-mail notifications can be enabled by editing the MAIL-ON-WARNING value as below. You will then receive a message when rkhunter hits a warning. Please note that local mail has to be setup correctly in order for mail notifications to function.
MAIL-ON-WARNING="username@domainname.com"
A related configuration option specifies the program and options for sending the mail:
MAIL_CMD=mail -s "[rkhunter] Warnings found for ${HOST_NAME}"
3.2 SSHD Root Logon
The parameter ALLOW_SSH_ROOT_USER tells rkhunter whether or not the root user is allowed to ssh into the system. This is unset by default in the rkhunter.conf file. Rkhunter will complain about this on every run. If you have disabled root login, you should set this parameter to "no".
ALLOW_SSH_ROOT_USER=no
If you need root login over SSH, you should change this parameter to "yes" so that rkhunter can check this and will mark this setting as valid:
ALLOW_SSH_ROOT_USER=yes
Security practices recommend disabling root login.
3.3 Whitelist known script files
The SCRIPTWHITELIST parameter can be set to tell rkhunter that these are expected, known to be safe files. This will prevent these files from triggering false positives on all subsequent checks.
SCRIPTWHITELIST="/usr/bin/ldd"
SCRIPTWHITELIST="/bin/which"
Whitelist Files in /dev Directory
4. Update rkhunter
To check the currently installed version enter the following:
# rkhunter --versioncheck
Run the updater by issuing the following command:
# rkhunter --update
With our database files refreshed, we need to tell rkhunter to check the current values and store them as known-good values:
# rkhunter --propupd
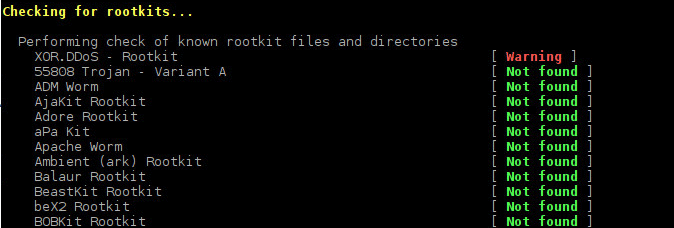
5. Manual Scan
You can initiate a manual scan by issuing the following command:
rkhunter -c
Which runs rkhunter in interactive mode. In other words, when it gets to the end of a particular scan, you need to press 'enter' to continue. If you want to "auto skip" interactive mode, add the -sk option at the end:
rkhunter -c -sk
Your scan results should look as follows:
---------------------------- Scan results ----------------------------

MD5 scan
Scanned files: 0
Incorrect MD5 checksums: 0

File scan
Scanned files: 412
Possible infected files: 0

Application scan
Vulnerable applications: 0

Scanning took 39 seconds

-----------------------------------------------------------------------
Further Commands
--checktells rkhunter to perform various checks on the local system. The result of each test will be displayed on stdout. If anything suspicious is found, then a warning will be displayed. A log file of the tests and the results will be automatically produced. It is suggested that this command option is run regularly in order to ensure that the system has not been compromised.--unlocksimply unlocks (removes) the lock file. If this option is used on its own, then no log file is created.--appendlogBy default a new log file will be created when rkhunter runs, and the previous log file will be renamed by having .old appended to its name. This option tells rkhunter to append to the existing log file. If the log file does not exist, then it will be created.--debugThis is a special option mainly for the developers. It produces no output on stdout. Regular logging will continue as per default or as specified by the --logfile option, and the debug output will be in a randomly generated filename which starts with /tmp/rkhunter-debug
7. rkhunter help
For more information and options please run the following command.
# rkhunter --help
